
Verifying a sending domain is a crucial step when you’re using SendMails.io for your email marketing campaigns. This process ensures that your emails are sent correctly and reach the intended recipients. In this guide, we’ll walk you through the steps to verify a sending domain in SendMails.io.
Why Verify a Sending Domain? #
- Email Delivery: Ensures your emails are delivered to the right inbox.
- Domain Reputation: Builds trust with email service providers.
- Recipient Trust: Increases the likelihood that recipients will open your emails.
Navigate to the Sending Tab #
- Log in to your SendMails.io account.
- Go to the Sending Tab on the dashboard.
- Click on Sending Domains.
This will take you to a new dashboard where you can add your sending domain.
Add Your Domain #
- Click on + New Sending Domain.
- Enter your domain name in the provided field.
- Enable the Signing option.
- Click Save.
You’ll then be provided with two DNS records that you need to add to your DNS Zone Editor.
Locate Your DNS Zone Editor #
Finding your DNS Zone Editor depends on your hosting provider. You can easily find it by searching for “[Your Hosting Provider] DNS Zone Editor” on the internet. You’ll find articles and videos that guide you to the DNS Zone Editor for your specific provider.
Add the DNS Records #
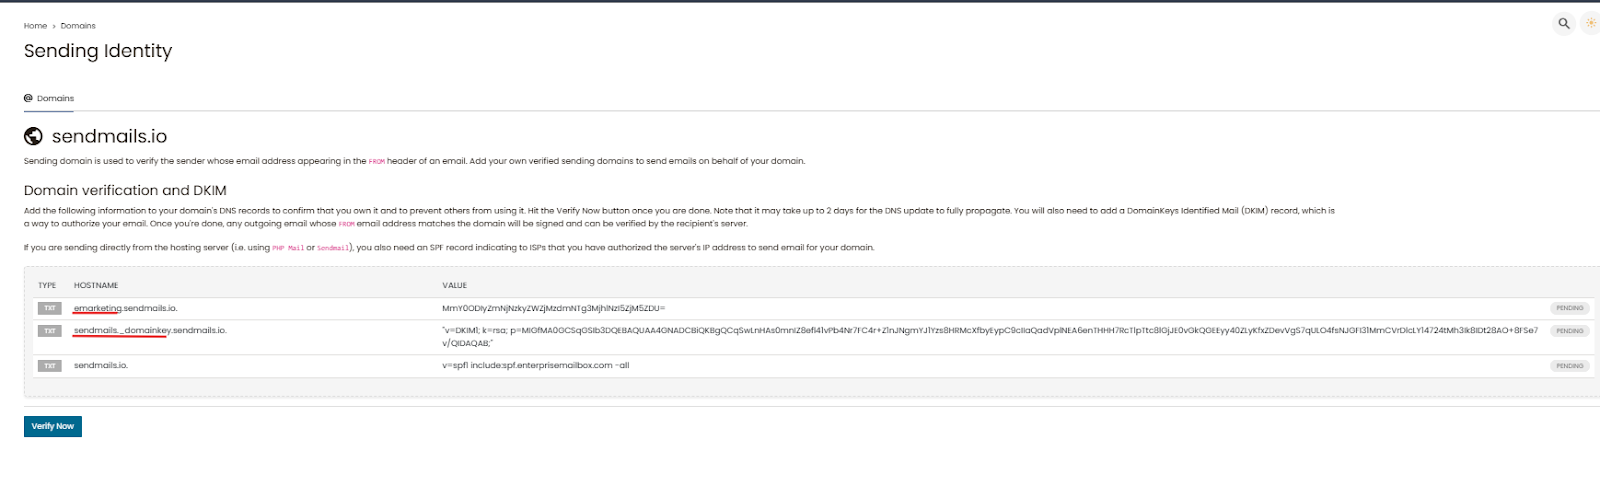
Domain Verification and DKIM Records : #
- Copy the Host/Name — do not include your domain while copying; your provider will add it automatically. (example: copy only emarketing instead of emarketing.sendmails.io ; sendmails._domainkey instead of sendmails._domainkey.sendmails.io)
- Paste the Value provided by SendMails.io.
- Add the first 2 records the same way.
SPF Record : #
- The SPF record is the third record
- Add this under the Host/Name: @ (or leave blank if your provider requires it).
- Paste the SPF value provided by SendMails.io.
If your SPF record isn’t verified after waiting for 48 hours, you might have more than one SPF record set up — which isn’t allowed. Here’s how to check and fix it:
Check for Multiple SPF Records #
- Go to MXToolbox SPF Lookup.
- Enter your domain name in the search box.
- Click SPF Record Lookup.

Review the Results #
- If everything is fine, you’ll see one SPF record.
- If you have more than one, you’ll see a warning:
“More than one record found.”
The conflicting SPF records will be listed in red at the top.
What to Do If You Have Multiple SPF Records #
You’ll need to merge all the ‘include’ values into a single SPF record.
For example:
If you have :
v=spf1 include:spf.protection.outlook.com ~all
and
v=spf1 include:spf.enterprisemailbox.com -all
Merge them like this:
v=spf1 include:spf.protection.outlook.com include:spf.enterprisemailbox.com -all
Then delete the extra SPF record(s), leaving just the merged one. There should only be one SPF record per domain.
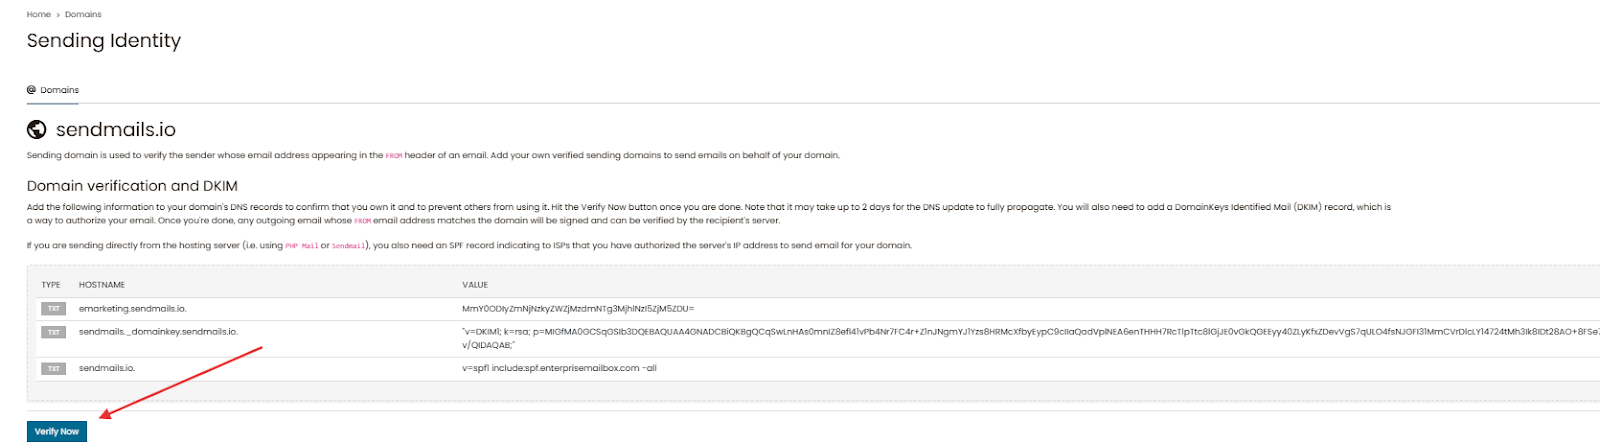
Verification #
After adding the DNS records, it may take 24 to 48 hours for the changes to propagate. Once the changes are reflected:
- Go back to SendMails.io.
- Click on Verify Now next to your domain.
If the verification is successful, you’ll see a Verified status next to your domain.
Troubleshooting: #
- Not Verified? DNS changes can take up to 24–48 hours to propagate.
- SPF not verified? Double-check that you have only one SPF record.
Conclusion #
Verifying your sending domain in SendMails.io is a straightforward process, but it’s crucial for ensuring the effectiveness of your email marketing campaigns. If you encounter any issues during the verification process, be patient and give it some time. The changes usually take a couple of days to propagate.
That’s it! Your sending domain is now verified, and you’re all set to send emails through SendMails.io.


